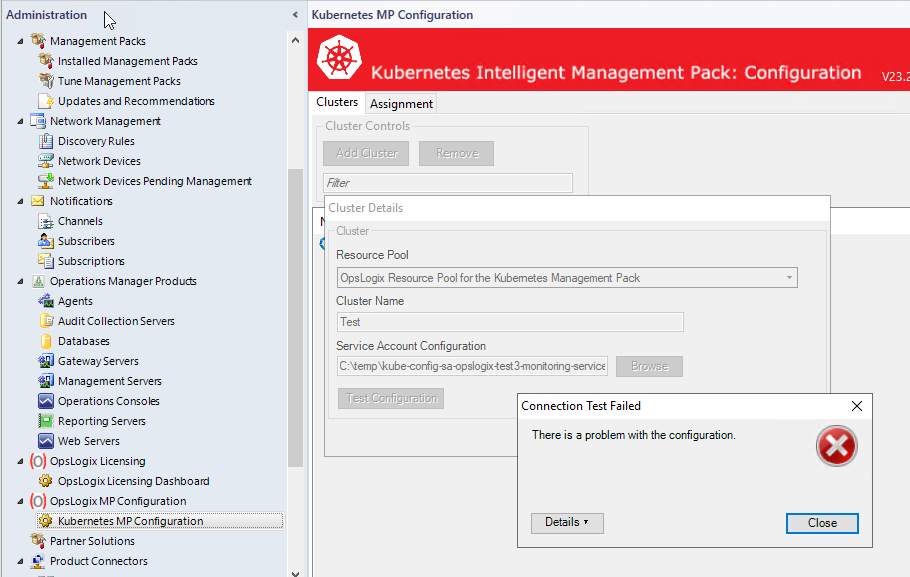
When you try to add a cluster to SCOM monitoring and the connection test fails, it might be hard to pinpoint why the connection to the cluster failed.
To troubleshoot your Kubernetes cluster connection you can follow the steps below:
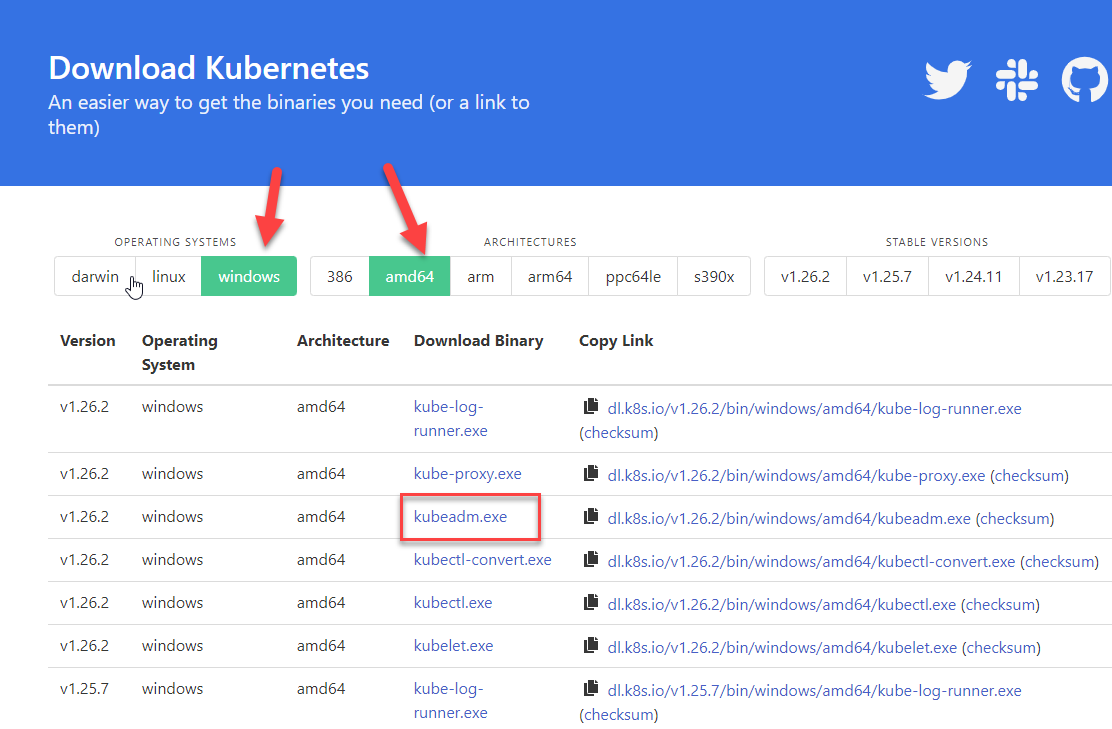
- Download the kubectl.exe from Download Kubernetes:
- Copy kubectl.exe to your SCOM server (doesn’t matter which directory). from which you would like to verify the .kube config file.
- On the server to which you copied the kubectl.exe file, open a cmd window and navigate to your user profile directory, for example: “c:\users\administrator.CONTOSO”. In this directory create a new sub-directory named “.kube”.
- Copy the config file (if it is not called config rename it to config before copying it) to the .kube directory you just created.
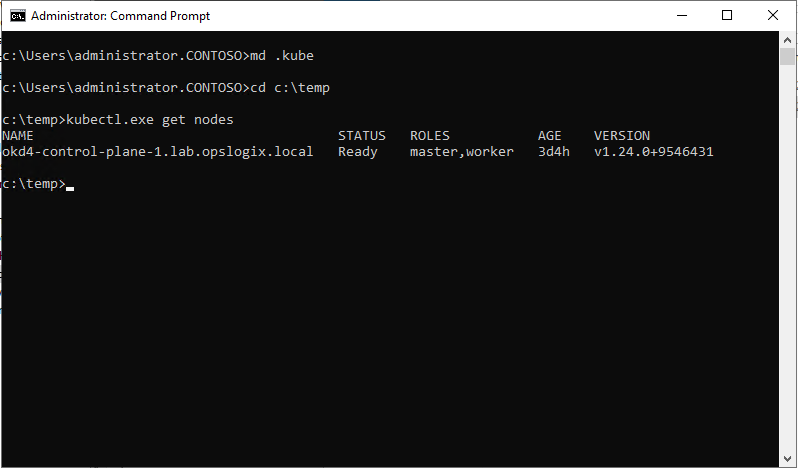
- Now from the cmd window browse to where you copied the kubectl.exe and run it as shown below:
kubectl.exe get nodes
It the connection is successful, you should receive output similar to that below in the screenshot: