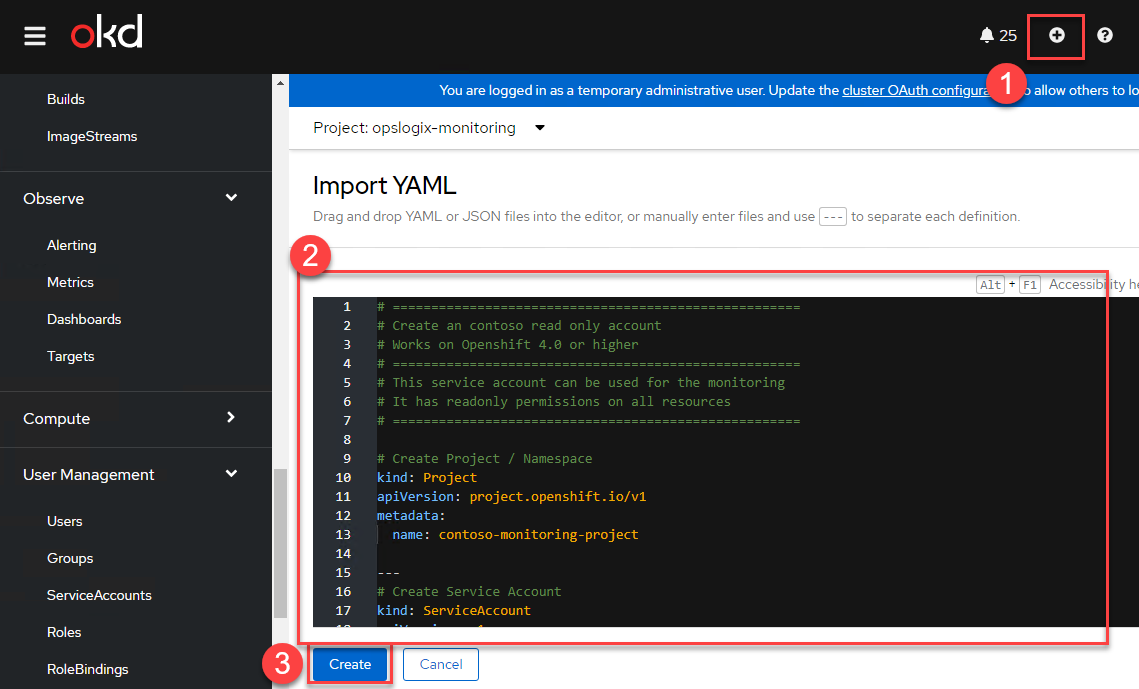
Open your OpenShift console and click the "+" button at the top of the page and paste the yaml below into the Import YAML field and click the Create button.
# =====================================================
# Create an opslogix read only account
# Works on Openshift 4.0 or higher
# =====================================================
# This service account can be used for the monitoring
# It has readonly permissions on all resources
# =====================================================

# Create Project / Namespace
kind: Project
apiVersion: project.openshift.io/v1
metadata:
  name: opslogix-monitoring-project

---
# Create a Secret
apiVersion: v1
kind: Secret
metadata:
  name: opslogix-secret
  namespace: opslogix-monitoring-project
  annotations:
    kubernetes.io/service-account.name: "opslogix-monitoring-serviceaccount"
type: kubernetes.io/service-account-token


---
# Create Service Account
kind: ServiceAccount
apiVersion: v1
metadata:
  name: opslogix-monitoring-serviceaccount
  namespace: opslogix-monitoring-project
secrets:
  - name: opslogix-secret

---

# Create readonly cluster wide Role
kind: ClusterRole
apiVersion: rbac.authorization.k8s.io/v1
metadata:
  name: opslogix-monitoring-clusterrole
  namespace: opslogix-monitoring-project
rules:
  - verbs:
      - get
      - watch
      - list
    apiGroups:
      - '*'
    resources:
      - '*'

---
# Create Cluster Role Binding for the ServiceAccount
kind: ClusterRoleBinding
apiVersion: rbac.authorization.k8s.io/v1
metadata:
  name: opslogix-monitoring-clusterrolebinding
  namespace: opslogix-monitoring-project
subjects:
  - kind: ServiceAccount
    name: opslogix-monitoring-serviceaccount
    namespace: opslogix-monitoring-project
roleRef:
  apiGroup: rbac.authorization.k8s.io
  kind: ClusterRole
  name: opslogix-monitoring-clusterrole
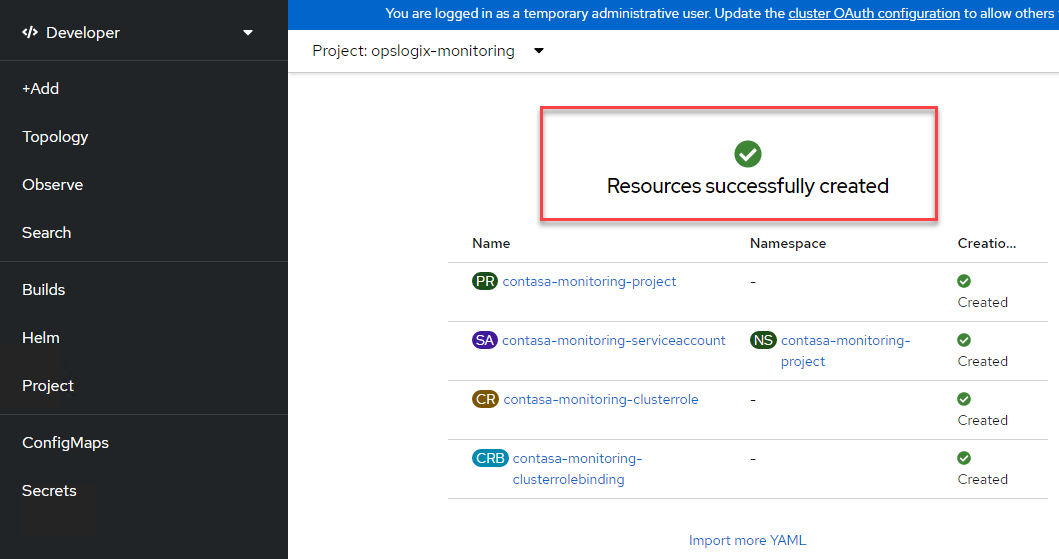
If all went well, the resource is successfully created.
In version 4.10 and below, you can download the kubeconfig file by selecting the Administrator section on the page.

Navigate to User Management -> ServiceAccounts. Then select opslogix-monitoring from the Project drop down. Then next to opslogix-monitoring click the three dots and select Download kubeconfig file.
NOTE: The kubeconfig file can only be downloaded through the web interface in version 4.10 and below. To generate the kubeconfig file in version 4.11 and above, continue with the guide below.

In order to generate a kubeconfig file for version 4.11 and above, use the OC command to connect to the cluster.

Then retrieve the secret of the service account by running the command.
oc get secret opslogix-secret -n opslogix-monitoring-project -o jsonpath='{.data.token}' | base64 -d

Copy the secret to the token field in the token field for the user.

The kubeconfig file can be used in the Kubernetes Management Pack configuration console to connect to the Kubernetes cluster.